Collector's Corner
FROM HEART AND HAND: The Creation of Juan de la Cruz’s Stone Mountain Lion Jar
Mar
I have admired Juan de la Cruz’s ceramic vessels for a number of years, but I had been unable to acquire one until recently for one simple reason: they sell like proverbial hotcakes. As soon as they appear on the King Galleries website, collectors snatch them up. I was never fast enough. Finally, I inquired if I could simply ask the artist to make a piece especially for me. It was then that Charles King made a suggestion: “Let’s have him make a piece in a size that you like, a shape and design concept (i.e. do you like animals or scenes or a Santa Clara story??). THEN…we can have him document it as he is making it and it would make a great article!” And that is how I acquired Juan de la Cruz’s Stone Mountain Lion Jar.
The ceramics created by Juan de las Cruz are complex works on many levels, starting with the clay he collects. De la Cruz gathers and prepares the clay, which he uses to build his pieces and to produce the natural slips with which he paints them. Colors are derived from specific clays or other natural sources. Each vessel is hand coiled and traditionally fired with wood the artist has gathered.
As the Stone Mountain Lion Jar was being made, the artist emailed me photographs that were accompanied by written information that documented the various steps in its creation. Throughout the process, I asked Juan questions for which I received detailed responses, which made this article a collaborative effort. We also became friends.

The Puki.
Juan explained that the above photograph shows “the very start of the process in setting the puki up on the workbench. . . . This is the clay base which helps to form the base of the pot and provide it with stability while it’s drying. As a little linguistic aside to this and an amusing one at that, the Tewa term for this bowl utilizes the same word for ‘buttocks’ because in using it you’re essentially forming the ‘buttocks’ of the pot, i.e. the base it sits upon.”
I also asked Juan about the two bowls behind the puki. “As for the two bowls that are sitting behind the puki,” he responded, “the metal one is filled with water. Within that metal one is floating the khy’aphe, sponges and wooden tongue depressors. The clay bowl sitting further behind simply holds more of the same . . . and . . . simply serves as storage. The khy’aphe are simply dried pieces of gourd that have been cut into an oval shape and are of various sizes. The reason that there is a metal bowl is that it keeps all of the items that I’m going to use wet. There are only a certain number of khy’aphe that are needed for each piece, that being determined by the size and shape of the pot being built.”

The first step in building a ceramic pot.
As someone who has never made pottery or worked with clay, I wondered exactly how the puki was used and Juan explained just what was done. When the pot is first being made,” he wrote,” it is not a ball of clay that is pressed into the puki; rather, it’s a round disc or tortilla of clay that is put in to form itself to the shape of the puki. Once this disc of clay has been pressed in by hand, a rim is formed by the edge of that disc from which the first coil of clay is added to start building up the wall of the pot itself.” Juan also explained that the terms pot and jar are used interchangeably by Pueblo ceramic artists.

The piece is built up coil by coil.
With each group of photos he sent me, Juan explained what I was seeing. He described how the piece was built up coil by coil and added, regarding the photo above, “From the earlier stages of the wall building, you can see my thumb indentations sealing the newly placed coil upon the previous one, thus solidifying its structure.”

The piece begins to take shape.

The jar’s sides rise.

The jar has taken shape.
According to Juan, “Following these initial layers of coils, the pot begins to take on a more distinctive shape with the khy’aphe (dried gourd scrapers) being used to smooth the surface of the joined coils on the exterior while pressing out and gently forming it up from the interior of the pot’s walls to give it the shape I desire

What will become the finished lip.

The rim begins to take shape.

The finished lip.
Once the piece has taken on the intended shape, the area known as the lip must be formed and smoothed into shape as can be seen in the above three photographs. Juan explained the process and what immediately follows: “The lip of the pot is the final coil, which is placed and smoothed to terminate the clay wall. Once this has been completed, a wet sponge is run over the entire surface of the piece, smoothing any residual surface imperfections away and giving the clay a beautiful smooth and glossy sheen. “

The jar has been formed and is ready to be taken off the puki to dry.

The piece must now dry.
Juan detailed what came next: “On the following morning after the pot has been made, it is removed from its puki and further surface imperfections are scraped away; these being located where the raw clay was in direct contact with sitting in the puki. The piece is then allowed to sit on the bench for several days to completely dry. This drying process time can vary widely depending on the size of the piece and the season of the year in which it happens to be constructed.

The piece has now completely dried and is ready to be sanded.

A wet sponge is now run over the surface of the piece.
Juan patiently explained the next step in the process to me. “Once the pot had fully dried,” he wrote, “I took it outside and worked on the rough clay surface with sandpaper until the requisite smoothness was attained. After the sanding of the piece, a sponge is soaked in a pan of water and then gently run over the surface of the pot as a final stage in removing any striations from the sanding process.”

The lip is polished.

The base is polished.

A red clay slip is applied over the polished underside of the jar.
Juan described the next steps in the process, which involved both the polishing and the application of a slip. “ . . . the polishing stone is applied to both the rim of the pot and the underside;” Juan explained, “this is the first part of defining the amount of space for designing. For the underside, a soft lead pencil is used to demarcate how high the polishing will rise up on the wall of the pot. Once this stone polishing process has been completed, I apply a red clay slip over the entire polished portion of the underside of the pot. This pot is then allowed to sit for a time in order to allow the red clay slip to dry completely. Once it has dried, a soft cloth is then used to burnish and polish the red clay slip layer.”

The white slip is applied.

More coats of white slip are applied.

The slip has been burnished and polished to a high sheen.
“The next stage of the process,” Juan wrote, “is . . . the application of the white clay slip. This slip is applied with a wide brush and is put on in successive layers. This particular piece required two full days for this process. The reason for . . . is that when a layer of white clay slip has been applied it must be allowed to dry completely. If any residual moisture is allowed to remain and gets trapped below the surface of a freshly applied layer of slip it will cause serious blistering issues further down the road, translating to a lot of lost time, work, and materials. At the conclusion of this process, a cloth is taken up once again to burnish and polish it to a high sheen. Gears will now be shifted over to the sketch pad where the design will be planned out.”

From the artist’s sketchbook.

Detail from the artist’s sketchbook.

From the artist’s sketchbook.

Detail from the artist’s sketchbook.
Throughout the process of creating the Stone Mountain Lion Jar, Juan was a continual font of information, even going so far as to share with me images of pages from his sketchbook. “I do preliminary sketches for every piece,” he wrote, ”It allows me to work out my lines and proportions on the infinitely more forgiving surface of the paper, being that it is a one-shot go when sketching the design onto the clay slip of the pottery.”
Juan went on to describe his concept for the piece: “I was planning on having two realistic mountain lions along with the two stone mountain lions on the piece. However, there will also be a geometric design divider as well; and within that, there’ll be a stylized mountain lion interwoven into the rest of the pattern. Considering that, one could say there are three mountain lions, taking into account the two realistic ones along with the geometric one within the divider.” In a subsequent email, Juan added more information about the imagery that would be on the piece: “. . . there will be two human figures that I’ll have placed before the ‘stone mountain lions’ shrine. The way the shape of this piece turned out, it provided quite a bit of canvas space for this size.” Juan also explained his intent with regard to the mountain lions on the piece. “In drawing out the big cats,” he wrote, “my aim was to try and capture the lithe and graceful movement being partnered with their deadly strength. As with all of my designs, I always try to attain a flow that will translate well onto the curved surface of the pottery.”

The imagery is sketched onto the jar’s surface.
Juan next detailed technical aspects of his process of transferring the images from his drawings to the three-dimensional pot. “. . . the first step that I took was to measure out the margin of my design space for this piece now that it is slipped and the bottom border has been demarcated and polished. The margin for this particular piece came out to 8″ according to the tape measure. The tape measure serves me quite well in this endeavor being that it conforms to the convex shape of the piece, giving me an accurate measurement of the space that I get to work with. I then draw out two guidelines onto the sketchbook paper, providing me with the requisite 8″ band of design space. From there, it’s just a matter of sitting down at the desk and sketching out the big cats. For this, I use one of my favorite mechanical drafting pencils with a 2H lead because of the crisp lines that I can achieve when teasing out my concept sketch on the paper. I make specific mention of the type of pencil and lead because that will soon change with the next step of drawing the finished concept sketch onto the surface of the piece itself.”
In later emails, Juan described what was physically necessary for him to draw the mountain lions and other imagery onto the pot. “Generally, I’ll cradle the pot in my lap and keep my sketchbook close at hand,” he wrote, “so that I can keep it as a constant reference as I freehand sketch the design onto the pot. It can take longer than when drawing it out on paper because you have to be very careful with the white clay slip itself. A light hand is required when
using the pencil because it’s entirely possible to gouge the surface of the clay. For this particular stage of the design process, I set aside my trusty mechanical drafting pencil and rather opt for a woodless lead pencil that is of a hardness level of 4B or higher. This softer lead not only leaves a more visible mark on the clay slip, but it’s also safer for the polished clay surface.”

Juan sketching out the designs on the piece with a 4b pencil.
In order to sketch out the designs on the piece, Juan used a #4b pencil. According to Juan, “The workflow at this stage consists of keeping the sketchbook with the figures that I’ve planned out and drawn beforehand within close viewing distance so that I can keep both the sketched page and the surface of the piece within my field of view simultaneously being that everything is sketched on freed hand.”
Many ceramic artists have told me that as each piece is being created it “tells” its maker what it wants to be. Juan wrote that he had an update for me about the piece the Stone Mountain Lion Jar: “There will only be one human figure on the piece now. As the design was moving along, I felt that it looked too busy with the additional figure, and actually, with this piece of yours, it’s the big cats that are taking center stage for the design.”
Juan revealed to me that he had a fairly clear concept for the geometric designs on the piece, or so he thought. “However,” he wrote, “new elements always enter in during this process because to see it on the curved surface of the piece itself can suggest completely new lines and forms that could not be fully conceived within a 2D context. From start to finish, like the malleable clay, the designing of the pot is a flexible process.”

The first layer of clay slip is painted onto the piece.
The above photograph shows the first layer of clay slip that Juan frequently uses as a background tone to set off the imagery on the piece he is creating. Juan explained this part of the process: “Unlike some of the subsequent clay slips, this one is applied in only one layer.”

More slips are added to the piece.

Areas of the design begin to take form from the sketched guidelines on the white clay slip.
As Juan continued to apply the different clay slips, the images outlined in pencil on the piece began to emerge. At this point in the process, he was nearing the final outlining of the areas that have been painted.

The application of the slips continues.
According to Juan, the portions of the piece that now needed to be addressed were the figure of the woman and the two mountain lions. “At this stage with the mountain lions,” Juan explained, “I just have the base yellow clay slip layer applied. In this current state it has the appearance of a light ecru in color, but when it’s fired it deepens into a more defined yellow tone.”

The woman’s clothing and other paraphernalia are covered in more slips.

Work on the mountain lions continues.

The mountain lions are given more detail.
The mountain lions are obviously an important design element on this piece. Juan delineated in detail the next stage of their completion. “With the mountain lions,” Juan wrote, “as it is with any realistic animal that I happen to depict on a pot, the planning out of the layering must be careful and deliberate being that there is no option to go back once the layer has been applied. In this particular instance, the light yellow clay slip has been applied in a light wash and serves as a nice color base for the fur. Now, with this subsequent layer, I’ve actually applied the very same clay slip that I’ve used for the background tone of the piece. However, as you can see from the pictures, I’ve applied it far more liberally in order for its pure color to come out and stand in contrast with the diluted wash of the background. Each layer must be applied individually and then given some time to dry. If this is not done, there is a risk of oversaturating the base white clay slip with moisture, which could then lead to peeling during the firing process.”


The jar is ready for firing.
Once all of the slips have been applied to the piece it is ready for the firing. “At this stage,” Juan wrote, “it’s been gone over a few times, checking for any areas that need to be touched up, elements to be added, etc.”

The piece is put into the firing box.
In preparation for the firing, the piece is put into a firing box. According to Juan, the boxes that are utilized for this process are constructed from pieces of scrap tin of varying sizes to accommodate the many sizes and shapes of the vessels being fired.

The piece is fired.
A preliminary firing is first done on the piece, which involves a minimum amount of kindling and other firewood. The fire is allowed to burn just long enough to heat the firing box and the pot inside it. While the materials from this firing are still hot, heavier pieces of firewood are stacked along the sides of the firing box. This must be done very quickly since this wood will rapidly catch fire. Once this has been done, sheets of old tin are placed on all four sides of the firing box in order to protect the fire from errant breezes. The tin sheets also act as reflectors for the massive amount of heat that is produced. “This not only keeps us safer while we sit there to the side observing the firing,” Juan explained, “but it also serves to keep the heat focused in on the firing box itself.

”The completed piece: The two figurative lions. Stone Mountain Lion Jar by Juan de la Cruz, Santa Clara Pueblo, natural clay slips, “ x “ (2020). Collection of E. J. Guarino.”
“The twist this one [Stone Mountain Lion Jar],” has taken with the design,” Juan wrote, “has been quite exciting; by having the two mountain lions in the positions that I’ve drawn them, it’s allowed for a more dynamic layout of the geometric designs.”

The completed piece: The abstract lion.
“I have to admit that I’m pretty excited about how the two mountain lions have turned out,” Juan continued, “being that in the initial piece that I’d done with this theme I just had the one big cat prowling ahead of the hunter; whereas with the two leaping in tandem, it’s provided this very dynamic design difference.”

The completed piece: The three mountain lions.
I was curious about the title of the piece and the word stone being used in relation to the mountain lions. “As for the stone mountain lions,” Juan explained, “this is a reference to the various carved shrines in the area that depict these big cats. The most well-documented one being the ones at Cochiti. Of course, the way that I’ve depicted them . . . is a reimagined restoration of them, being that the real thing has suffered from weathering and vandalism. This also ties in with the overall theme of the ‘hunt’.”

The completed piece: The Game Mother figure.
I was also curious about the figure of the woman on the jar and what she was holding. “Concerning the woman that I have featured in the design,” Juan continued, “she represents a ‘game mother’ figure, who is making an offering at the shrine of the stone mountain lions. The offerings are present in both of her hands, the open bowl with cornmeal in the one and a fox pelt being held in the other. The fox pelt would be the item that you were asking about, and it would represent one of the gifts procured from the hunt, while the cornmeal is being offered in thanksgiving for the bounty.”

The completed piece: the geometric design divider.
One of the most beautiful aspects of the Stone Mountain Lion Jar is the design divider. Curious to know what the symbols meant I asked Juan to explain them. “The abstract imagery that is present within the geometric divider contains several different elements that are related to the ‘hunt’ theme of the piece,” Juan wrote. “The topmost element with the half-circle depicts stylized prayer sticks and feather offerings that would be placed at a shrine within a receptacle that would enable all of these to stand upright. The green-colored element within this group is a stylized pine bough with feathers attached to the very end of it. Other items depicted within the group are stylized eagle feathers and a turkey feather.”
Juan continued by next focusing on the lower portion of the imagery: “Below the line supporting the stylized offerings group is a shield with a bird of prey wrapping around half of its diameter and continuing on down with its tail feathers. The pattern on the shield again represents a more simplified version of prayer feathers being offered along with the paw of the mountain lion, all keeping in line with the ‘hunt’. Directly below the shield and stylized bird is a representation of a prayer stick with feathers and accouterments attached to it. To the right of these elements are the wing feathers that sit directly below the second mountain lion. These serve as a reminder of the fleet and deadly speed which the mountain lion possesses when in pouncing distance of its prey.”
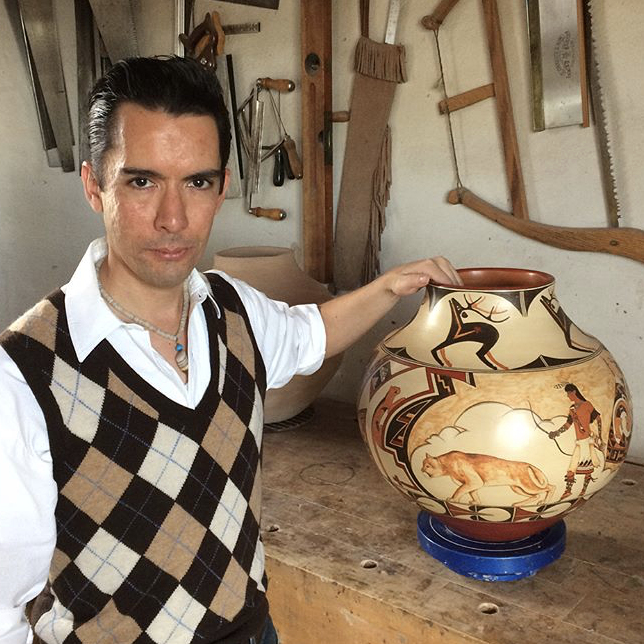
Although he takes inspiration from the pottery of his mother, Lois Gutierrez, the pieces produced by Juan de la Cruz are distinctly his own. He draws upon Pueblo lore, decorating his pottery with figures and geometric designs. Greek amphoras have also been an influence, particularly how the figures on them suggest movement. Sketches made of these ancient ceramics have influenced the imagery de la Cruz uses on his own pieces.

Watercolor for Stone Mountain Lion Jar, with a description on reverse side, by Juan de la Cruz, Santa Clara Pueblo, 4”x 8” (2020).

Juan’s statement about the piece on the reverse of the watercolor.
Originally known for his paintings and illustrations, Juan de la Cruz eventually applied these talents to painting on pottery. As an accompaniment to each ceramic piece he creates, Juan paints a watercolor on a card, which includes a statement about the piece on the reverse side. In this way, he can explore the same themes, but in another medium.
Juan de la Cruz is a unique voice among ceramic artists. He combines the traditional and the modern. Not only does he collect his own wood for the firing process and clays from which he produces the paints and slips he uses, but his work is also the expression of a modern artist who utilizes ceramic vessels in much the same way as a painter uses canvas. Perhaps no one has expressed the essence of his art better than Juan de la Cruz himself: “. . . I just prefer to ensconce myself in the studio and immerse myself in my work without giving any thought as to whether it will fall into a specific category, or if it conforms to the current spirit of the age . . . . I always just hope to create something beautiful and that it will give joy to the person who owns it.”
The author would like to express his sincere gratitude to Juan de la Cruz for generously providing photographs and a wealth of information about the creation of the Stone Mountain Jar. This article exists because Juan was so magnanimous in sharing details about his creative process.
Thanks also to Charles King who came up with the concept for this article.